
What Is a Pull-Up Banner? A Guide for Event Pros
TL;DR:
- A pull-up banner is a portable display with a retractable graphic stored inside a spring-loaded base and extended with a support pole. It sets up quickly, is highly portable, and offers protection for the graphic during transport and use. Proper handling of retraction and placement enhances its lifespan and visual impact at trade shows.
A pull-up banner is defined as a portable retractable display where a printed graphic stores inside a spring-loaded base and extends vertically using a telescoping support pole. The industry also calls this product a roll-up banner or retractable banner stand, and all three terms describe the same hardware. Marketing and event professionals rely on these displays at trade shows, conferences, and retail activations because they set up in under a minute and pack down into a single carry case. Standard widths run 800–1,000 mm with assembled heights around 2 meters, making them tall enough to read from across a crowded exhibit hall.
What is a pull-up banner and how does it work?
A pull-up banner consists of three core components: a weighted base housing the retractable cassette, a telescoping support pole, and the printed graphic itself. The spring-loaded cassette keeps the graphic under tension so it stays taut when extended and retracts cleanly when you pack up. The graphic is pre-installed at the factory, so there are no separate parts to lose or assemble beyond the pole.
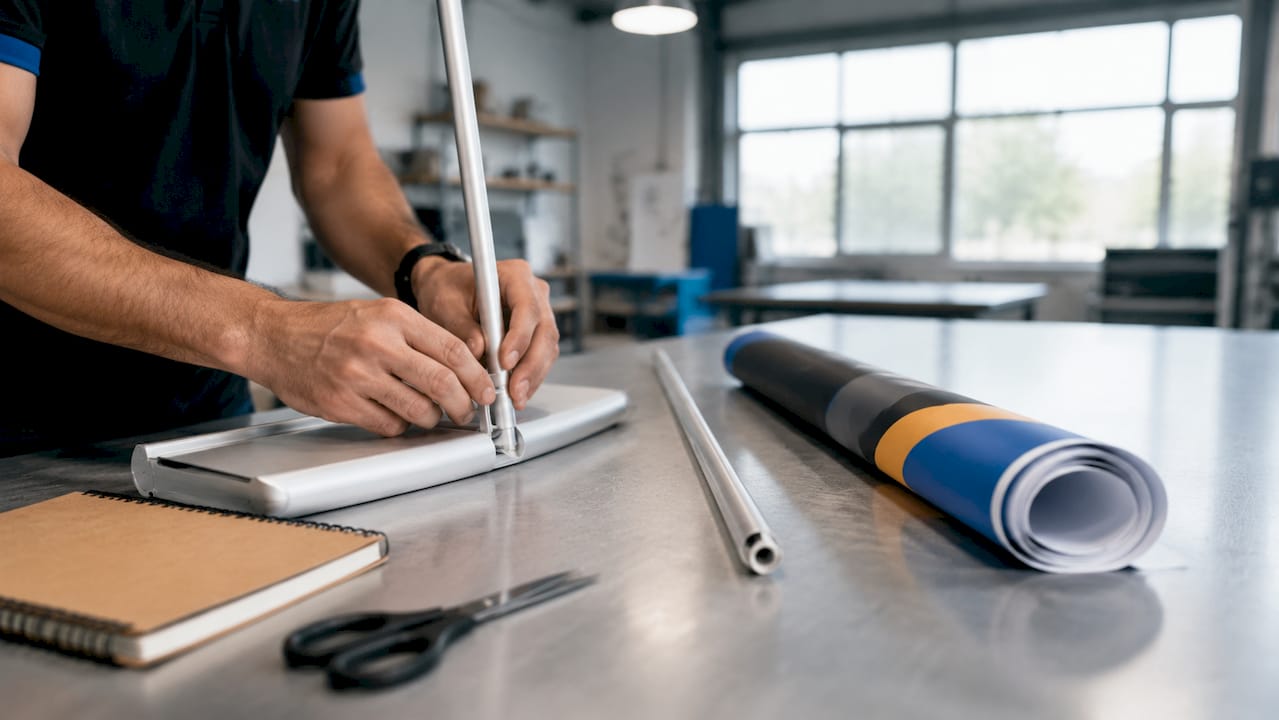
The name comes directly from the action of use. Pulling the graphic upward from the base is the entire deployment motion, and the spring mechanism handles the reverse when you break down. Different regions call the same product a pull-up banner, roll-up banner, or retractable banner, but the hardware is identical.
Step-by-step setup process
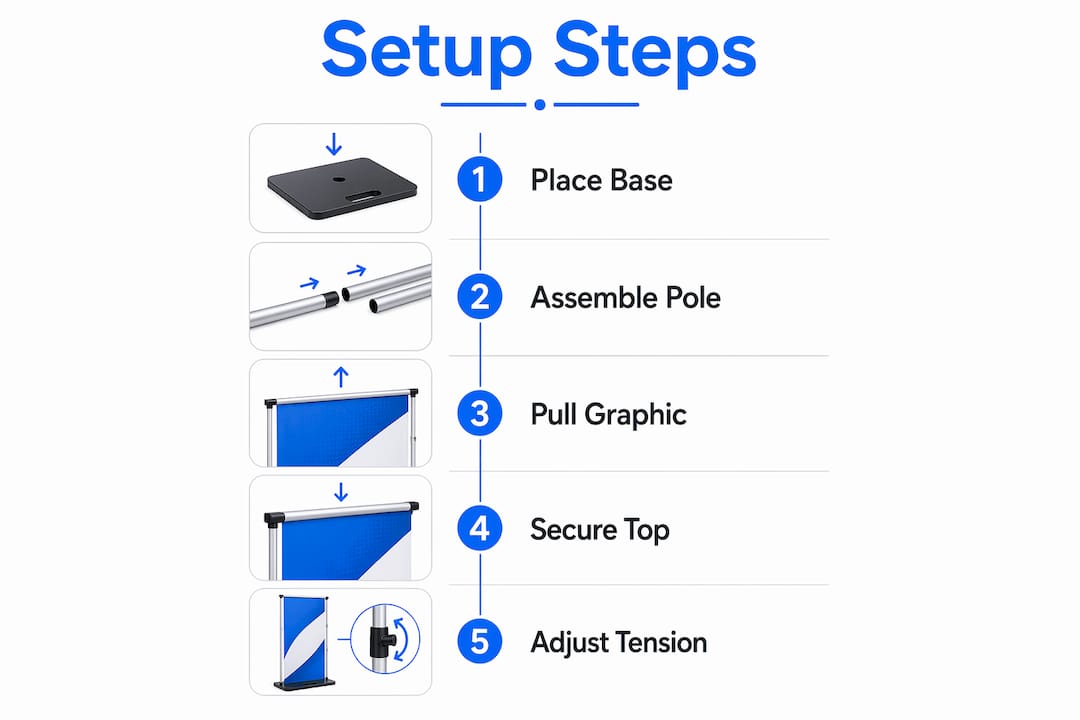
Setting up a pull-up banner correctly protects the graphic and extends its usable life. Follow these four steps every time:
- Place the base on a flat, stable surface. Check that it sits level before pulling anything upward.
- Assemble the telescoping pole by connecting the sections until locked. Most poles have two or three segments.
- Pull the graphic upward slowly and steadily. Attach the top of the graphic to the pole hook or bracket.
- Secure the pole into the base slot and confirm the graphic is taut with no slack.
Packing down follows the same logic in reverse. Hold the top of the graphic and guide it back into the base with controlled tension. Smooth retraction prevents creasing and avoids snapping the spring mechanism. Most units weigh between 3–5 kg and fit inside a padded carry bag for transport between events.
Pro Tip: Never let the graphic snap back into the base on its own. Guide it down by hand every single time. Abrupt snapping accelerates wear on both the cassette and the printed surface, shortening the banner’s life significantly.
Key advantages of pull-up banners for trade show marketing
Pull-up banners reduce complexity at event setups by keeping all components in one unit. The graphic is pre-installed inside the base, with no separate components except the support pole. That means one person can set up a full display in under a minute, which matters when you are building out a booth before doors open.
The pull-up banner advantages that matter most to event professionals include:
- Portability. The carry case fits in an overhead bin or the trunk of a car. No freight shipping required for a single unit.
- Protected graphic storage. The printed surface stays inside the base during transport, shielded from scratches, folds, and moisture.
- Fast one-person setup. No tools, no hardware, no second pair of hands needed.
- Professional appearance. The clean, frameless front face puts the graphic front and center without visible hardware distracting from the design.
- Reusability. Repeated use at trade shows, conferences, and retail events is built into the product design.
- Versatility. Pull-up banners work in hotel ballrooms, convention centers, retail floors, and corporate lobbies without modification.
Compared to non-retractable banner options, pull-up banners require no grommets, no mounting hardware, and no wall access. That versatility makes them the default choice for exhibitors who move between venues frequently.
Pull-up banner vs roll-up banner vs vinyl banner: what is the difference?
The pull-up banner vs roll-up banner question is the most common terminology confusion in event marketing. The answer is straightforward: they are the same product. Both names describe a retractable banner with a spring-loaded base. Regional preference determines which name a vendor uses.
Vinyl banners are a different product category entirely. The table below clarifies the key differences across the three most common banner types event professionals encounter.
| Feature | Pull-up / Roll-up banner | Vinyl banner | Pop-up display |
|---|---|---|---|
| Setup method | Pulls from spring-loaded base | Grommets, ropes, or frames | Expanding frame with fabric or vinyl |
| Setup time | Under 1 minute | 5–15 minutes | 10–20 minutes |
| Portability | Single carry bag, 3–5 kg | Flat roll or fold, varies | Large carry bag or case |
| Graphic protection | Stored inside base | Exposed during transport | Fabric stored on frame |
| Indoor / outdoor | Primarily indoor | Both indoor and outdoor | Primarily indoor |
| Typical use | Trade shows, conferences, retail | Outdoor events, storefronts | Large trade show booths |
Vinyl banners differ from pull-up banners in one critical way: they are flat sheets mounted with grommets, designed for horizontal or vertical attachment to walls, fences, or frames. They handle outdoor wind and weather far better than retractable units. For a detailed breakdown of vinyl banner materials and printing, Printdrill’s guide on vinyl banner materials covers the full comparison.
Pop-up displays occupy a different tier. They use an expanding aluminum frame that supports a large fabric or vinyl graphic, making them better suited for 10-foot booth backdrops than for portable single-unit displays. The right choice depends on your event type, booth size, and how often you travel between venues.
Best practices for designing effective pull-up banners
Pull-up banners function as vertical billboards built for viewing from a distance, not for close reading. That single insight changes every design decision you make. Attendees at a trade show will read your banner from 6–10 feet away while walking past. Your design must communicate the core message in two seconds or less.
Apply these design principles to every pull-up banner you produce:
- Use a minimum 300 DPI resolution for all print files. Low-resolution images look pixelated at full height and undermine the professional appearance the format is built for.
- Limit body text to three lines maximum. Use the top third of the banner for your logo and headline. Use the middle for one supporting message. Use the bottom for contact details or a call to action.
- Choose font sizes above 60 pt for headlines and above 30 pt for secondary text. Anything smaller becomes unreadable at distance.
- Use high-contrast color combinations. Dark text on a light background, or light text on a dark background, reads clearly from across a room. Mid-tone combinations fail at distance.
- Keep the color palette brand-consistent. Pull-up banners placed next to other booth materials need to match your brand colors exactly. Request a color proof before final production.
- Include one clear call to action. A website URL, a QR code, or a booth number gives attendees a next step. Two or more calls to action compete with each other and reduce response.
For trade show banner sizing, the standard 800 mm x 2,000 mm format fits most booth configurations. Wider formats at 1,000 mm give you more design space but require more floor area.
Pro Tip: Print a scaled proof at actual height before your event. Tape it to a wall and walk back 10 feet. You will immediately see which text is too small and which design elements disappear at viewing distance.
Key takeaways
A pull-up banner is the most portable, fastest-setup display format available for trade show and event marketing professionals.
| Point | Details |
|---|---|
| Core definition | A retractable display with a spring-loaded base, telescoping pole, and pre-installed printed graphic. |
| Setup speed | One person can set up a pull-up banner in under a minute with no tools required. |
| Pull-up vs roll-up | Both names describe the same product. Terminology varies by region, not by hardware. |
| Design priority | Treat the banner as a vertical billboard. Limit text, maximize contrast, and design for 10-foot viewing distance. |
| Graphic protection | Always guide the graphic back into the base by hand. Snapping damages the cassette and shortens banner life. |
What I have learned from years of pull-up banners at live events
The most common mistake I see at trade shows is exhibitors treating pull-up banners as afterthoughts. They order them last, design them quickly, and set them up without checking placement. Then they wonder why foot traffic walks past without stopping.
Placement is the variable most exhibitors underestimate. A pull-up banner positioned at the front corner of a 10x10 booth catches aisle traffic from two directions. The same banner placed flat against the back wall competes with every other display behind it. Position first, then design for that specific angle and distance.
The second thing I have learned is that banner life is almost entirely a function of how you handle retraction. Exhibitors who let the spring snap the graphic back into the base after every event replace their banners far more often than those who guide it down by hand. The hardware cost is the same. The handling discipline is free.
One trend worth watching in 2026 is the move toward fabric graphics in retractable bases. Fabric resists creasing better than standard polypropylene film, and the print quality on dye-sublimated fabric now rivals traditional banner materials. If you are ordering new units, ask your printer specifically about fabric graphic options for retractable stands.
Pull-up banners work best as part of a coordinated booth system, not as standalone pieces. Pair them with a double-sided retractable banner for corner placements, or combine them with a tension fabric backdrop for a complete booth environment. The individual unit is simple. The system it belongs to is what drives results.
— Printdrill
Custom retractable banners and event displays from Printdrill
Printdrill produces custom retractable banners built for trade show and event use, with commercial-grade hardware and vibrant large-format printing. Each unit ships with a carry case and is ready to deploy out of the box.
For exhibitors building a complete booth, Printdrill also offers custom fabric banners, tension fabric backdrops, tabletop retractable stands, and full trade show booth kits. Free design assistance is available for customers who need help preparing print-ready files. Orders ship nationwide with fast turnaround options. Visit printdrill.com to configure your display and request a proof before production.
FAQ
What is the pull-up banner definition in simple terms?
A pull-up banner is a self-standing display where a printed graphic pulls upward from a spring-loaded base and is held in place by a telescoping pole. It is also called a roll-up banner or retractable banner stand.
How long does it take to set up a pull-up banner?
Most pull-up banners set up in under a minute using four steps: place the base, assemble the pole, pull the graphic up slowly, and secure the pole into the base.
What is the standard size for a pull-up banner?
Standard pull-up banner dimensions are approximately 800–1,000 mm wide and 2,000 mm tall, with a total unit weight of 3–5 kg including the carry case.
What is the difference between a pull-up banner and a vinyl banner?
A pull-up banner is a retractable self-standing unit designed for indoor vertical display. A vinyl banner is a flat printed sheet mounted with grommets, suited for both indoor and outdoor use on walls, fences, or frames.
How do you protect a pull-up banner graphic from damage?
Always guide the graphic back into the base by hand rather than letting it snap back on its own. Controlled retraction prevents creasing and extends the life of both the graphic and the cassette mechanism.
