First-Time Trade Show Exhibitor’s Guide: How to Set Up a Booth That Stands Out
1. Introduction – Why Your First Trade Show Matters
Walking into your first trade show as an exhibitor is equal parts exciting and nerve-wracking. You’ve invested in the booth, printed your materials, and trained your team—but now comes the big test: capturing attention in a sea of competitors. The reality is that most attendees will decide within a few seconds whether to stop at your booth or move on.
Common First-Timer Mistakes
- Relying on a bare table with no branding.
- Using mismatched or DIY signage that looks unprofessional.
- Forgetting to plan the booth layout in advance.
- Not budgeting enough for high-quality displays.
- Skipping the follow-up process after the event.
This guide breaks down everything you need to know to stand out, even if it’s your very first event. From pre-planning and signage to booth kits and post-show follow-up, you’ll walk away with a detailed checklist you can reuse at every trade show.
2. Pre-Event Planning (Before You Arrive)
Trade shows reward preparation. A well-thought-out plan will save you from last-minute headaches and ensure your investment delivers results.
Budgeting for Booth Design & Printing
Booths aren’t just about space rental—you’ll need signage, tables, covers, backdrops, and promotional materials. First-time exhibitors often underestimate these costs. Set aside 25–30% of your trade show budget for signage and displays, which are your most powerful branding tools.
Additional Costs to Consider:
- Shipping booth materials to the venue.
- Union labor for installation/dismantling at some convention centers.
- Electrical hookups for lighting or devices.
- Furniture rentals if your booth package doesn’t include them.
Pro Tip: Don’t forget hidden expenses like drayage (fees charged for moving freight from the loading dock to your booth). These can eat up a surprising portion of your budget.
Choosing the Right Booth Size & Layout
Most first-timers start with a 10x10 booth, the industry standard. It’s compact, affordable, and still gives you space to make an impression. Keep your layout intentional:
- Place a backdrop at the rear to create a branded wall.
- Position a table at the center or side for engagement.
- Use vertical banners at the aisle edge to draw foot traffic.
- Keep an open entrance—avoid blocking the front of your booth with tables.
Planning Signage in Advance
Many products (especially fabric displays) have production timelines of 5–7 business days. Plan at least 4–6 weeks ahead of the show to allow time for design, printing, shipping, and any unexpected delays.
Pro Tip Box
💡 Create a “Booth Map” in advance. Sketch where your table, banners, and backdrops will go. This ensures you order the right sizes and quantities.

3. Core Booth Signage & Displays
Your signage is your silent salesperson. It works 24/7, pulling people into your booth. Here are some PrintDrill products every first-time exhibitor should consider.
Retractable Banners – Portable & Reusable
Retractable banners are compact, portable, and set up in under a minute. They’re perfect for beginners who need convenience and flexibility. These displays are durable enough to be reused at multiple events, making them a smart first purchase.
X Banner Stands – Budget-Friendly Starter Displays
Affordable and lightweight, X stands are great for smaller budgets or first-time exhibitors who need a simple branding solution. They are best used for product highlights, promotions, or directional signage.
Fabric Displays & Backdrops – Professional Look
- EZ Extend Tension Fabric Display
- Straight Pillow Case Backdrop
- Step and Repeat Fabric Pop Up Straight Display
- Fabric Curved Pop Up Display
- Straight Fabric Pop Up Display
- Custom Backdrop Stand
- Step and Repeat Banner Adjustable Stand
Fabric displays offer a polished, professional look. They’re wrinkle-resistant, photo-friendly, and ideal for branding large spaces. Unlike vinyl, fabric won’t glare under harsh event lighting.
Illuminated Options
Illuminated displays stand out in dim convention halls, making your booth more attractive and modern. They help draw visitors in from across the hall, especially when paired with bold graphics.
Comparison: Retractable vs Fabric Backdrops
| Feature | Retractable Banner | Fabric Backdrop |
|---|---|---|
| Setup | Under 1 min | 5–10 min |
| Portability | Very compact | Larger case |
| Impact | Good for small spaces | High impact, full wall branding |
| Best Use | Quick branding | Full booth presence |

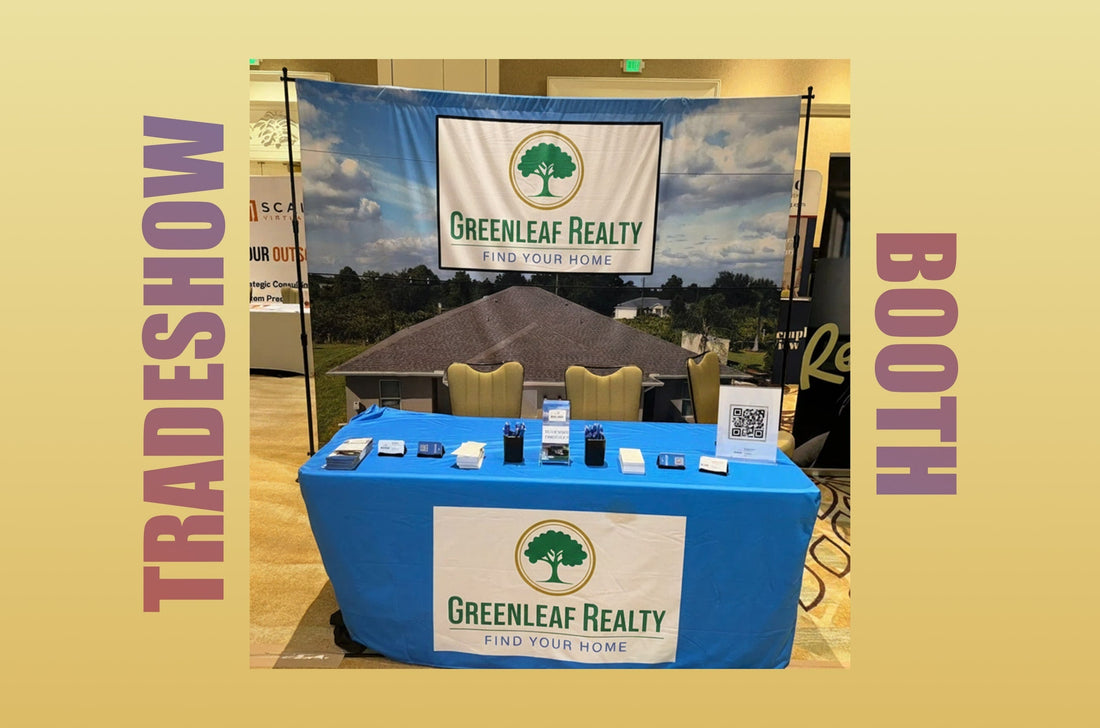
4. Tables & Counters – Your Booth Hub
Your booth’s table is more than just furniture—it’s your command center. It’s where you place literature, products, or giveaways, and where attendees engage with you. A table with a branded cover instantly adds polish and professionalism.
Table Branding Options
- Custom Table Runner
- Trade Show Printed Table Cover Throws
- Solid Color Table Cover
- Stretch Fit Table Cover
- Trade Show Portable Counter Podium
Benefits of Branded Table Covers:
- Instantly improves professionalism.
- Reinforces brand identity.
- Hides storage beneath the table.
- Creates consistency with backdrops and signage.
Pro Tip: Keep the tabletop clear of clutter. Use vertical racks or stands to display brochures instead of laying stacks flat.

5. Full Booth Kits for Beginners
For first-time exhibitors, all-in-one kits can save stress and guesswork. These packages include backdrops, tables, and banners, making setup a breeze. Instead of piecing together items one by one, you get a coordinated set designed for trade show use.
Options
- 10 ft Trade Show Display Kit - Economy
- Trade Show Display Kit - Basic
- Resident Event Display Package
Benefits of Booth Kits:
- All-in-one solution saves time.
- Easy setup with coordinated pieces.
- Cost-effective compared to buying items separately.
- Great for first-time exhibitors unsure what to buy.

6. Tabletop Displays – Small but Mighty
Not every booth has the luxury of space. For smaller areas or shared exhibits, tabletop displays are compact but still impactful. They help you make the most of limited square footage without sacrificing branding.
Products to consider:
Best Uses:
- Product demos on small tables.
- Supplemental signage to reinforce your main message.
- Affordable solutions for startups or budget-conscious exhibitors.
- Pro Tip: Pair a tabletop display with a branded table runner for a complete look that costs less than a full booth backdrop.

7. Design Tips to Make Your Booth Pop
A great booth isn’t about having the most stuff—it’s about having the right design.
Best Practices
- Keep branding consistent across all signage.
- Use bold colors and simple messaging (less is more).
- Always include a CTA: QR code, sign-up sheet, or freebie.
- Make sure text is readable from 8–10 feet away.
- Use lifestyle images that connect emotionally with your audience.
Common Design Mistakes to Avoid
- Overcrowding banners with too much text.
- Using stock images that don’t reflect your brand.
- Clashing colors that confuse instead of attract.
- Fonts that are too small or hard to read under event lighting.
Pro Tip Box
💡 Think of your booth as a mini billboard. People walking by have just 3–5 seconds to get the message.

8. Day-of Tips for First-Timers
The day of your event can be chaotic. Here are some practical survival tips:
- Arrive early for setup—you’ll always need more time than you think.
- Bring extra supplies: tape, extension cords, scissors, pens, cleaning wipes.
- Stand and smile—people approach booths with approachable staff.
- Practice a short pitch (30 seconds or less) to introduce your brand.
- Rotate staff to keep energy levels high.
- Keep water and snacks handy—you’ll be on your feet all day.
Day-of Essentials Checklist
- Tape & scissors.
- Power strips & extension cords.
- First aid kit.
- Snacks & water.
- Extra pens, notebooks, and phone chargers.
- Hand sanitizer and wipes.

9. Post-Event Checklist
The show isn’t over when the lights go down. How you follow up determines your ROI.
Checklist
- Collect all leads and follow up within 48 hours.
- Review which signage drew the most traffic.
- Record booth layout feedback for next time.
- Send thank-you emails to prospects and partners.
- Update CRM with notes on each lead.
- Share photos and event recaps on social media to keep momentum going.
Pro Tip: Send personalized follow-ups. Mention specific conversations to stand out from generic thank-you emails.

10. FAQs About First-Time Exhibiting
Q: What’s the easiest display to set up?
A: Retractable banners. They take less than a minute to set up and pack small.
Q: Do I need a full backdrop or is a retractable banner enough?
A: If budget allows, a backdrop creates bigger impact, but retractables are fine for beginners.
Q: How do I transport displays?
A: Most come with carrying cases. Fabric backdrops break down into compact frames for easy travel.
Q: Should I invest in a booth kit?
A:Yes, if you want an all-in-one solution that saves time and ensures a consistent look.
Q: How early should I book my booth space?
A: Ideally 6–9 months in advance, especially for major trade shows.
Q: How many staff should I bring?
A: For a 10x10 booth, 2 staffers are usually enough to manage foot traffic and engage attendees without crowding the space.
11. Conclusion & Next Steps
Your first trade show doesn’t need to be overwhelming. With proper planning, thoughtful design, and the right tools, you can create a booth that stands out, engages attendees, and generates leads. Start small with essentials like retractable banners and table covers, then expand as you attend more shows.
👉 Explore the full range of Trade Show Displays today.
